Share
Pin
Tweet
Send
Share
Send
The first step is to make an insole. To do this, circle the sole of the slap

Now you need to close the top of the slap. And for this it is necessary to outline a pattern on any thin paper such as newspaper or flyers, applying a slap to the top and outlining the contours with a marker.

Then we cut out of dense denim fabric our insole and the top of the future slipper. Glue on silicone sealant or rubber glue. The advantage of the sealant is that it does not stain the fabric, does not leave a stain when glued, the disadvantage is that when used, air penetrates the tube and then almost half of the sealant turns into solid silicone, so you should use it immediately.

When the substrate of dense fabric is ready and has closed the slap topography, you can proceed to the front of the slipper. To do this, the fabric came from the old payte with a fleece surface inside, but you can use any fabric like bikes. Fold the fabric inward with the front side and outline the insole with a marker on the sample and cut it out.

In the same way we outline the top of the slipper and cut it out.

Then glue the insole with the fleece side up and the top of the slipper with the fleece side down.

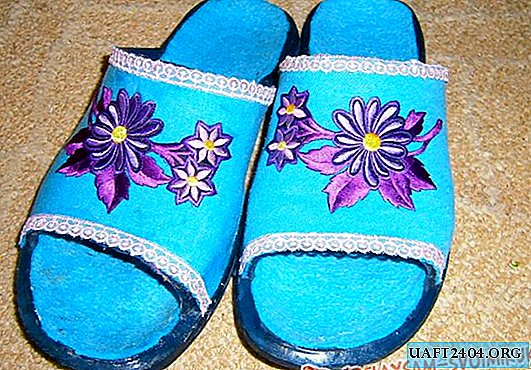
The advantage of fabric from payta is that it does not crumble, but still it is necessary to close tissue sections for beauty. I still have a piece of lace ribbon, which came in very handy for decorating a slipper. The edges of the tape were cut off and used as a border for the upper slipper. Also in the Sewing World store these wonderful flowers with an adhesive backing were discovered. By the way, they fit in the color of slippers and borders and were glued. It is necessary to glue by ironing the top of the flower.

And that’s what happened!

Share
Pin
Tweet
Send
Share
Send