Share
Pin
Tweet
Send
Share
Send
Why do I need to use expanded polystyrene?
Because polystyrene foam is much denser in structure than polystyrene. When you hit the wall, polystyrene foam will be more resistant to dents. Also, do not forget that in terms of heat saving, the thickness of polystyrene foam is equal to the same two thicknesses of polystyrene. And for internal insulation this is a space saving. Therefore, insulation of the apartment with expanded polystyrene will be more appropriate.
If you still decide to independently carry out the insulation of the apartment with expanded polystyrene, then this task can be handled without problems if you follow the tips and tips listed below.
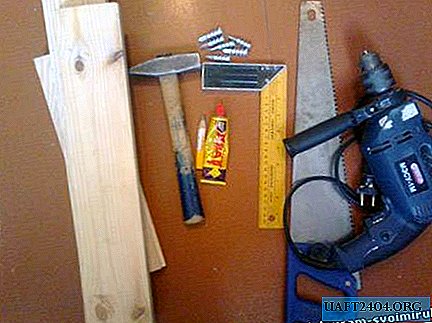
To perform the insulation of the apartment with polystyrene foam, it is necessary to prepare the following tools and materials:
- - a puncher with a chisel and a drill for 10;
- - An electric drill with a mixer for kneading building mixtures;
- - a bucket, a gear and flat spatula, a hammer;
- - glue for polystyrene foam boards;
- - umbrellas or fungi for attaching polystyrene plates (mounting rod 10 mm.);
- - polystyrene boards with a thickness of 20 mm .;
- - mesh for plastering;
- - putty.
Do-it-yourself wall insulation with polystyrene foam
First of all, you need to prepare the walls for insulation.
Remove the old wallpaper, and using a puncher with a chisel, beat the entire plaster to the base of the wall. Thoroughly sweep construction debris from all angles, collect it and take it out. Then, according to the instructions, mix glue for expanded polystyrene plates in a bucket with a drill with a mixer. Apply this adhesive with a notched trowel to the styrofoam plate and press it firmly against the wall.


Due to the teeth on the spatula, the adhesive is applied in strips, and at the time of gluing, these strips are lubricated into a continuous ball of glue. Thus, the plate adheres tightly to the wall without excess glue. Then you need to fix the glued polystyrene plate to the wall. For this, a hammer drill with a drill of 10 mm. Drill 5 holes in the wall directly through polystyrene foam. Holes should be placed at the corners of the slab and one in the center.


Insert the umbrella into the drilled hole with the fastening rod forward and secure it with a plastic dowel in the wall with a hammer. By tapping with a hammer, the umbrella must be drowned in polystyrene foam flush with the stove. Thus, glue and fasten to the wall all the plates of expanded polystyrene.


At this, the insulation of the apartment with polystyrene foam is not yet finished. The next step is to prepare the walls for finishing. All joints of polystyrene boards and umbrellas must be plastered. To do this, you can use the same glue. Coat all cracks and troughs with a flat spatula flush with polystyrene plates.


In this state, leave the walls until the glue has completely dried. Then stretch the plaster grid over the entire area of the wall. At the corners, you can use a serpentine net.


Putty putty in a clean bucket using a drill with a mixer. Using a flat spatula, putty evenly over the entire wall area. Why is a clean bucket so important when kneading putty? If there are particles of garbage or sand in the bucket, then when puttying they will interfere with the puttying in an even layer, creating strips and stains. Walls are preferably putty in two layers. After all the layers of putty have completely dried, the insulation of the apartment with polystyrene foam is considered complete.

Share
Pin
Tweet
Send
Share
Send

