Share
Pin
Tweet
Send
Share
Send
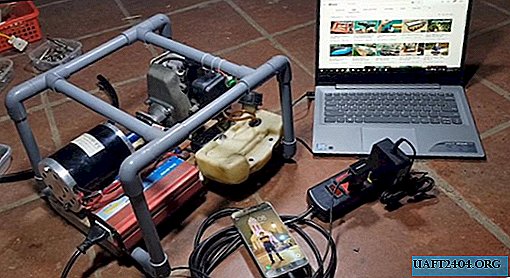
Our dynamo generator is as unique as it is simple. However, with its help it is possible, for example, to establish lighting in a house or a tent on a lake, or even connect a small heater. Well, if you have a phone or tablet, you can easily charge any of these devices.
We assemble the necessary components, tools
This unit consists of the following parts:
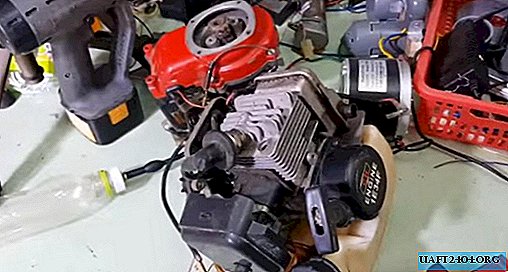
- Engine from scythes;
- DC motor - 12-24V;

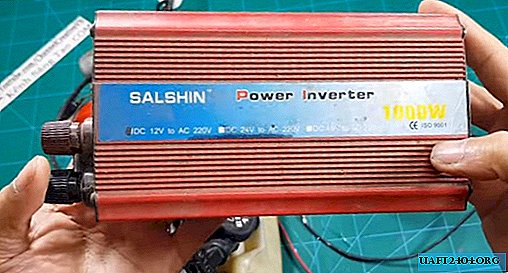
- Inverter 12-220V;
- Pipes (pieces of flexible PVC pipe of different diameters)
- A piece of a board for a bed (thickness 35-40mm);
- Hardware - self-tapping screws, screws, bolts, nuts, clamps, terminals;
- Insulating tape.


Of the tools we need:
- Drill or screwdriver + drill and cross head for self-tapping screws;
- A circular saw or a jigsaw (for hobbyists, a hacksaw is suitable);
- Voltmeter;
- Screwdrivers, pliers, a paint knife or scissors;
- Square, tape measure.
The principle of operation of the dynamo generator
The basis of our generator is a DC motor, which is able to operate in generator mode by converting mechanical energy into electrical energy through the phenomenon of electromagnetic induction. The rotation of the armature in the magnetic field of the primary winding of the DC motor provides the engine from the brushcutter. When rotating in a DC motor in generator mode, a variable EMF is formed, which is converted to a constant voltage through a brush collector.
Getting started assembling the unit
Stage one: we fix the engine from the brushcutter
To begin with, we take a section of the board and cut it first to the size of our bed. It is advisable to take weighty material so that our equipment has a solid and reliable foundation.

Mark the position of the engine from the brushcutter. Using a paper template, we precisely mark the holes by drilling them with a drill or screwdriver.


We try on both engines on the bed. We disconnect the fuel tank, and on the seats we fix the engine from the brushcutter.


Stage two: we fix the DC motor
Mark the position of the engine. The distance from both motor shafts should be a few centimeters to avoid friction between them.

We center the shafts of our engines. The discrepancy in the centers is easiest to correct with any gaskets, or simply fix the seat on a wooden frame. This can be done with the usual chisel. The smaller the backlash between the shafts, the less vibration will be from the unit and the wear of the moving part.

We mark the nozzles. Most often, motor shafts vary in diameter. It is also fixable if PVC hoses of different diameters are used as connecting pipes. Their flexibility will help smooth out the smallest inaccuracy in shaft alignment. In our case, the author used two hoses of different diameters, inserting one into the other.


Having cut off the pipes of the length we need, we install three clamps on both sides, pressing them with a screwdriver.

We fix the DC motor to self-tapping screws, laying them first with washers. We connect the shafts by hand and squeeze the clamps with a screwdriver.

Now you can fix the fuel tank. To cope with this task is not difficult, using a long screw and a trimmed cap from the dowel-nail. Do not forget to connect the fuel pipes.


Having started the fuel engine with a starter, we measure the output voltage with a voltmeter. We adjust the fuel supply with a screwdriver, and the number of revolutions, on which the voltage depends. Guided by the inverter rating, we set the output voltage with a small margin.

Stage Three: Connect the Inverter
The pre-peeled cable ends from the DC motor are fixed to the terminals of the inverter. The power indicator immediately shows the activity of the device.


A simple control (a bulb with a piece of cable and a plug at the end) checks the operation of our miracle generator.

To connect the electric motor to the inverter, we use the terminals.

Stage Four: Engine Shutdown Button
Since we drive a motor that creates mechanical rotation, it needs a switch. The power button is bundled with the device, so it only needs to find a convenient place.


Stage five: make a casing-frame
We make a protective frame from polypropylene pipes with a diameter of 25-32mm, making holes in the bed with a pen drill.


At the corners we connect it with fittings.

If there is no plumbing soldering iron, the design can be connected to a specialized adhesive for PP pipes.

Such a frame will also help in carrying the device.

Well, to eliminate noise from the vibration of our device, you can fix 4 thrust bearings on the back of the bed, making them, as shown in the photo, from pieces of an old bicycle chamber.

Stage Six: Starting Battery
In order not to once again pull the starter of the fuel engine, the author of the video used a lithium-polymer battery (LiPo) to briefly start the DC engine. This comparative new device can really be powerful, and withstand a large number of duty cycles with minimal loss of capacitive power. Thus, the fuel engine is started by electric, while its starter remains as a fallback.

We connect the output contacts of the battery to the terminals of the inverter through the start toggle switch, tying the cable from the wires with nylon ties. The charging socket can be pulled out to the side so that it is convenient to connect it for charging.

We also fix the button to turn off the fuel engine

Stage seven: test run of the unit
After checking all the contact groups and fasteners of prefabricated elements, we start the unit. The engine start and stop buttons should work flawlessly. It is worth noting that the starting battery is used for only a few seconds, and then turns off.

Operation tips
For long-term and safe operation of the DC motor and inverter, no special conditions are required, except perhaps for protection against moisture and power surges.
As for the lithium-polymer battery, it is unacceptable to deeply discharge it (less than 3.3 V) and in no case should it be allowed to overheat above 60 degrees Celsius. Charging of such devices is also carried out by specialized devices that do not allow overcharging, and before use in the cold it is necessary to warm them up at room temperature.
Fuel engines also need to comply with operating rules: the correct selection of a combustible mixture, cleaning air and fuel filters, preventing engine overheating, etc. In a closed room, exhaust from the engine must be provided with ventilation.
And the rest, such equipment, assembled by yourself, can last a long time, supplying precious electricity to the cottage, fishing or just on vacation in the country!
Share
Pin
Tweet
Send
Share
Send