Share
Pin
Tweet
Send
Share
Send
Preface: "At the beginning there was a glass. Disposable."
My first experiments were carried out in plastic cups because of their easy accessibility and low cost. But over time, the experiments became more complicated, it became necessary to heat the solutions. Also, glasses, like any dishes, got dirty, it’s inconvenient to wash them, and it’s not rational to use new ones constantly. First of all, from the point of view of environmental pollution - nature must be protected. What can we say about their instability ("How many solutions were on the table because of the plastic ...").
Glass jars of cucumbers and mayonnaise of various sizes replaced plastic dishes. But then again, heating is risky for them. This dish does not tolerate sudden changes in temperature.
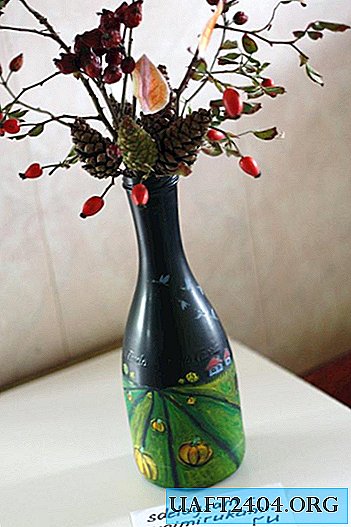
The stage of the chemical activity that I was in required frequent evaporation of the solutions, and damage to the vessel would be very undesirable. Acquaintance with glass business was inevitable. It turned out that the temperature differences can withstand fine glass. And then the gleam, the light came on. Up to 90% of the energy consumed by an incandescent lamp goes into heat. And this means that in the first seconds after turning on the glass bulb of the bulb experiences a sharp change in temperature, and it does not burst! I realized that this is what I need.
Of course, in addition to flasks, test tubes are also needed - for conducting experiments that are not so serious. Mix solutions with a glass rod, heat them - on a special rack.
All this will be considered in this article.
Will need
So we need:
- Hairpin M3;
- 20 nuts M3;
- Hairpin M8;
- 8 nuts M8;
- Cooler grate from under a computer power supply;
- Plumbing corner with a diameter of 50mm;
- Plastic case for the cartridge.

And, of course, the lamps:
- 40 watts (future volume - about 75 ml);
- 150 watts (about 150 ml);
- 500 watts (500ml).

Flasks
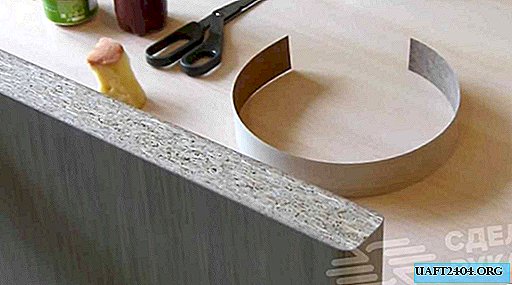
Before breaking glass, let's build racks for future flasks. First for a big one.
To do this, remove the gum from the corner and saw off the part in which it lay. We level the place sawn if necessary.

Also sawed off a piece on the other hand, it is convenient to put a flask on 150ml on it.
We try on a sawn ring:

A little free climb - excellent.
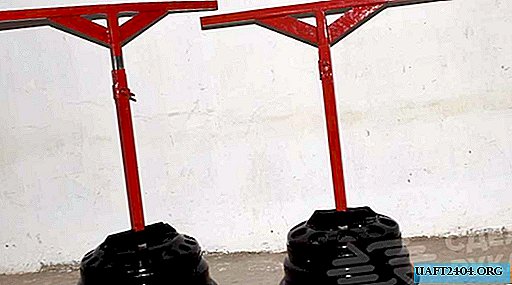
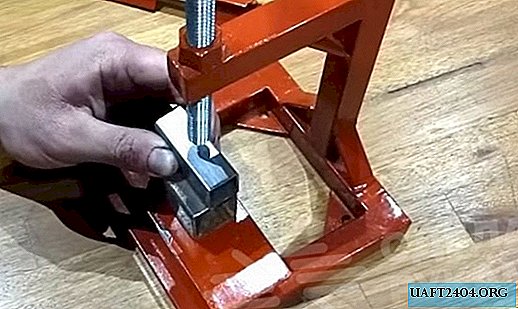
Now we saw off four pieces 13 cm long from the hairpin. For this, a hacksaw for metal or a jigsaw with an appropriate blade is suitable. At a distance of 2 cm from the edge, we bend 90 degrees.

He glued the nuts at the ends tightly, for greater reliability.
Using a hot screwdriver, make four mutually opposite holes in the ring. We put the studs in them and fix each with two nuts.

Try on:


Everything fits. If some leg does not touch the surface, you need to slightly straighten two nearby ones.
For the middle bulb from the M3 pin, we bend the following design:

Its dimensions are shown in the following figures.


By analogy, we make a stand for the smallest flask, if necessary.
Also, all bases can be weighted with lead weights.
Now let's move on to the flasks themselves. There are two ways to break the lamp for our needs: using a glass cutter, and without it.
1 way
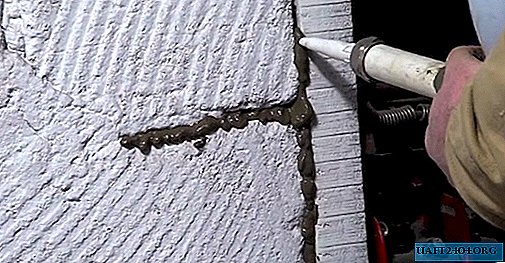
Along the base we draw a line with a glass cutter, gently pressing the glass.
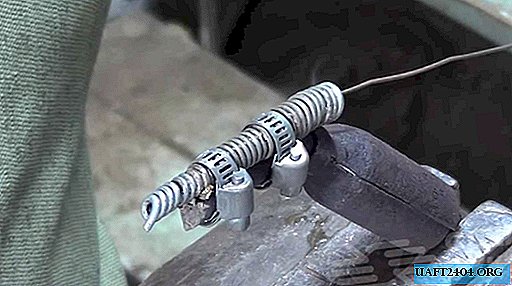
Now you need to find a transformer that can glow a small segment of a nichrome thread. I fixed the thread between two bolts with the help of nuts.

It is also necessary to prepare some ice.
Turn on the power and apply the lamp with the intended line to the thread for 20 seconds

Immediately after this, we cool the place of heating with ice. A crack should form. We perform this procedure for the entire line. Then the base with the filament can be separated in a simple motion from the bulb. We perform the same fraud for all lamps.
The flasks are ready.

I recommend reading with small bulbs, they are less valuable. The first cut will not turn out as smooth as we would like, but each next one will be more and more pleased with its quality. Here, practice is important. Yes, and the edges of the flasks can always be tried on an emery wheel, but this article is not about that.
Do not throw away the base with the inside of the 500 Watt lamp! Later come in handy.
2 way
Using a pair of nippers and a hammer, remove the middle contact of the lamp, together with the black ceramic insulation. Through the hole formed by tapping with a straight screwdriver, we carefully knock out the inside of the lamp. Pour the fragments on a napkin and dispose of them. Then you need to get rid of the remains of the base and the glue on which it was held, and the flask is ready.
Accordingly, the integrity of the glass tube with the contacts will not be preserved. There is also a risk of accidentally breaking the flask with the same contacts. Be extremely careful, always wear gloves!
Stir stick
After making a large flask, we still have a base with a glass rod.

It is quite long and quite suitable for us. By pressing pliers on the edges of the socle (at the joints of the glue), we can completely separate the glass part from the glue and the socle itself.
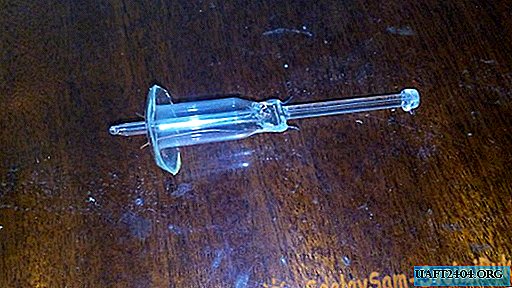
We bite off the antennae, bend the contacts, the glass at the edges of the joint slightly crackes, but this is not critical. It is better to leave a slightly thick glass rim (from the base), because an attempt to break it off turned into a crash: the inner glass also cracked. The operation was successful only the second time:

Antibody residues can react with concentrated sulfuric acid. Thus, they can be completely eliminated.
Test tubes
Glass vials can be found in some pharmacies. After walking around the city, in some they will certainly be sold. I found these:

For ease of use, let's make a rack for them. On one of the parts of the cassette case draw a line:

We pass through it with a clerical knife.
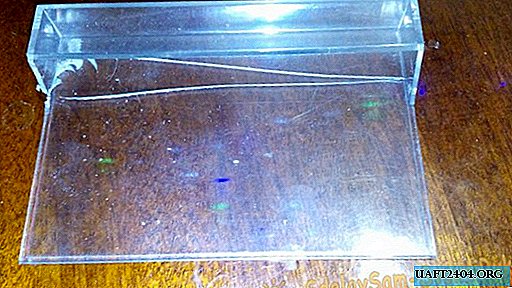
And break the part into two parts. Thus, we formed a rectangle on which six times at a small distance from each other we circle the neck of the tube.

Now along the outlined circles you need to make slots. We do it with the same knife, constantly heating it on the stove. Care must be taken so that the plastic does not crack.

We cut off the cassette holders from the second part of the case.

This will be the base of the rack.
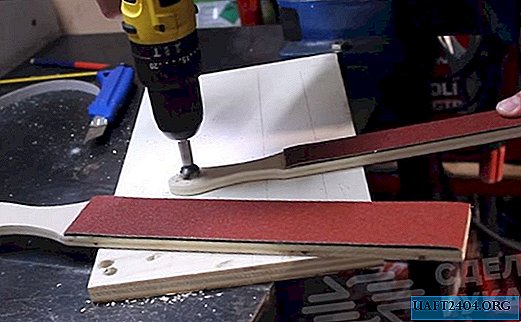
We saw off two segments of 10 cm from the M3 hairpin and make corresponding holes on the edges of both plastic parts. We assemble the structure together (we fix the parts with nuts both on top and bottom).
When heated, the plastic softens, we apply this property and make indentations for the tubes in the base with their help. The stand is ready.

A piston from a twenty-cubic syringe fits perfectly as a cover. They can tightly close the tube.

By the way, if necessary, the tubes can be clamped in a clothespin (when heated, for example).
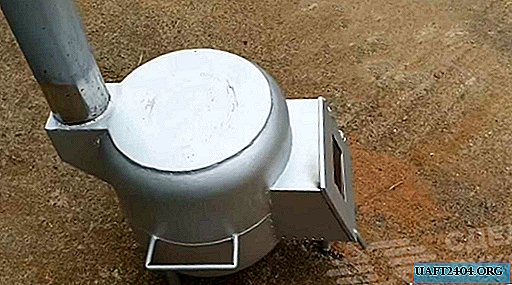
Heating stand
In order to evaporate solutions, you need a special stand for heating them. We will make it from the cooler grill, M8 studs and nuts. So, we saw off four segments 15 cm long.

We expand the fixing holes of the grill, and, with the help of nuts, we fix the hairpin segments in their places. Done.

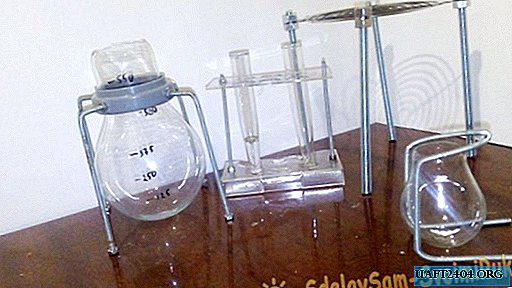
All cookware assembly:

Conclusion
In this article, we made the basic chemical glassware for a wide variety of experiments. "Strength test" one of the flasks was successfully passed in an article about the manufacture of hydrochloric acid. As for heating flasks in an open flame, I recommend experimenting on your own and finding the best option for yourself (share your experience in the comments).
If you heat any particularly active solution and worry about the integrity of the flask, you can heat through the sand.
PS: I know about the existence of chemical stores and Chinese kits. But here the originality of the idea is important, and there are no specialized stores in every city.
Not so much time was spent on making dishes, but there was a lot of joy when using flasks ... These are dishes of real evil geniuses or noble chemists.
All successful experiments!
Share
Pin
Tweet
Send
Share
Send