Share
Pin
Tweet
Send
Share
Send
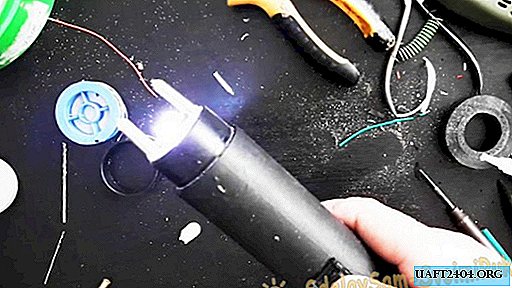
It is used to repel an attack. For example, feral dogs, when the device is idle, a strong smell of ozone spreads at lightning speed, which can scare away the animal, since the smell of ozone in animals is associated with thunder and lightning, and causes a feeling of anxiety. In view of this very threat of feral dogs, I, in fact, built this little thing. With my craving for traveling and hiking through forests, quite often lately, I have come across these animals face to face (more precisely, face to face!). While lucky, but to continue to try my luck, I do not burn with desire. To buy a stun gun in a special store is not a cheap pleasure. More or less normal and not expensive and, as a rule, not the most powerful, it costs from 4000r. That's why the idea came to assemble a shocker yourself, from purchased components. And it was necessary to buy only the amplifier coil itself, the charge controller for the battery, and the 18650 battery itself. But to assemble the case yourself. If I had a battery and a single-cycle contactor, then the charge controller board with a micro usb input at 5 volts, and the coil itself had to be ordered in the entire well-known Chinese online store. These goods cost me a little over three hundred rubles - the price difference is obvious, in comparison with the finished device! I did not have to wait long. The input voltage specified in the description is within 3-6 volts. Well, the output voltage of the coil is 400 kilovolts.

What, of course, I very much doubt! A short study (watching videos and reading literature on this topic) showed that on sale, this kind of special equipment (for civilians), go from 50,000 to 80,000 volts. The power structures (police, etc.) have more powerful special equipment - from 100,000 to 200,000 volts ... And then 400,000! No, it’s unlikely ... Moreover, everyone knows that our respected Chinese neighbors love, to put it mildly, to exaggerate the quality of their goods. But at least fifty to seventy thousand volts, I think, should be in this device. Doing less simply does not make sense - it will not be in demand. One way or another, I do not have a device for checking such voltage values, therefore, I will be content with what I have.
Will need
- The pipe is plastic, 17cm long.
- Pipe of the same diameter 4-5 cm, for the cap.
- A tube, or a jar with a bottom, slightly smaller in diameter.
- Converter coil.
- Charge controller with Micro USB input (for a standard charger).
- Battery 18650.
- One-stroke contactor (preferably with a folding safety casing).
- Contacts from an electric plug.
- Wiring corresponding to the wires on the coil.

Tool and consumables:
- Bor machine with a set of drills and a cutting disc.
- Soldering iron with tin and flux.
- Glue type cold welding.
- Glue second with soda.
- Insulating tape.
- Marker.
- Needle file.
- Stationery knife.
- Pliers.

Making a simple stun gun
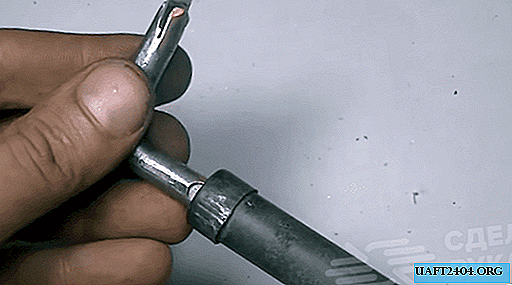
First you need to collect the "working" part of the device, namely; contacts. I took the contacts from the electric plug. Thick ones. Chrome plated. It is necessary to sharpen their tips using a grinding wheel.


Next, you need to make suitable holes for these contacts at the top of the future device. As a tip I took a tube from a film; It fits perfectly with the inside diameter of the pipe. So, we heat the contacts with a soldering iron, and we burn holes through them at the top. One against the other, as close to the walls as possible.

Further, just below the middle of the length of the contacts, we drill in them holes for branching, along which the electric arc will continue to run.

We insert branches made of brass pins a little thinner into the holes, and solder them with tin, for greater reliability. As in the photo:


Now we insert the coil at the top, shorten the output wires, tin, solder the contacts to them, thread the contacts into the holes, and glue them with soda and glue.


If the coil is too small in diameter, you can wrap it with electrical tape, to the desired thickness. The top is ready. Try it on to the pipe. Cut a hole in the pipe for the contactor. Immediately after the place where the coil will be located inside.

Next, we shorten the negative (here it is, for some reason, green!) Wire, so that it is enough to the hole. Plus, on the contrary; build up so that it sticks out of the "tail" of the pipe.

Solder a piece of green wire to one of the contacts of the contactor, which is enough until the end of the pipe. To the second contact of the contactor, we solder the end of the green wire shortened from the coil sticking out of the hole.

Insert the contactor into the hole.

Now let's take charge controller. My controller has two outputs: one to charge the battery, the second to the device. But I want to connect the device directly to the battery, because the output to the device in the controller gives less current than necessary. This will not affect the charging of the battery - we will not use the device while charging!

So, we solder the battery to the corresponding output, and solder the wires of the device to the same output. Do not forget about the polarity.


We wrap the battery with electrical tape to the desired thickness so that it does not hang inside, isolate the soldered contacts, and push the battery inward.

Another point: in order to avoid getting a discharge by accidentally pressing the contactor, before connecting the battery to the device, put a cap on the top with the contacts, which will be a short pipe section. As I mentioned; the inner diameter of this pipe is ideally suited to the top made of a film tube. Now, from cold welding, we will fashion something like holders for the charge controller inside the pipe so that it also does not hang inside. When the holders are frozen, install them on the controller and place all this inside the pipe (the video shows more and more in detail and more clearly). It remains to cut out the plastic covers for the cap and for the bottom. For the bottom, I took white plastic because, through it, you can see the charge indication on the controller. We cut out in it, in the appropriate place, the hole for the micro USB plug, and glue it to the pipe. For greater reliability, I drilled holes with a millimeter drill into the walls, against each other, and put the lid on the screws as well.


In the same way, only without a hole, we cut out the cap for the cap from already black plastic and glue it in place.


Everything, the device is assembled.


When transporting, be sure to use the cap - although the closure key is pressed quite resiliently, caution is never unnecessary.
Remember the safety rules. Remember about criminal liability for exceeding the limits of permissible self-defense. Never use a stun gun against children, the disabled, and pregnant women. Never use an ESA for fun, without a threat to health and life.
Also, if a violent conflict is 100% inevitable, it can be used as a preventive measure in order to “reassure” the aggressor while you can safely retreat to a safe distance, and thereby avoid the more serious consequences of the conflict. It is strictly forbidden to use this special tool against children, people with disabilities, and pregnant women, no matter what threat poses from them. Of course, it’s impossible to kill anyone with such a device, due to the low current power - the voltage is huge, but the force is negligible. However, it should stop very well (except for an unbelted gopnik, a violent drunk, or a robber), also a furious animal.
Share
Pin
Tweet
Send
Share
Send

