Share
Pin
Tweet
Send
Share
Send
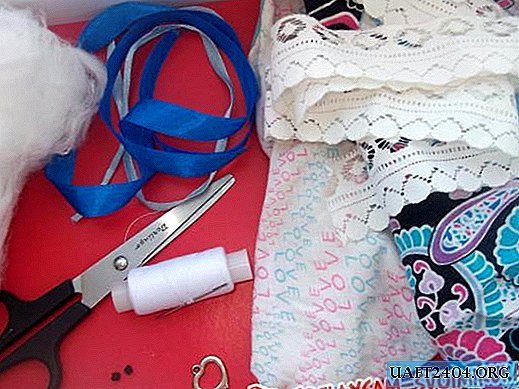
The knitting process takes no more than an hour of your time. To get started, you will need yarn, a hook of the appropriate size, a ruler, scissors and decor elements.
You can choose any yarn. I took my favorite milk-white streychevoy pechora. This yarn is very soft and soft to the touch, the seams of the product will not even be felt by the skin of the newborn. And it also has the ability to stretch, which allows you to use the product from the very first days of the baby's life to three months.
In the description, I took the following abbreviations:
VP - air loop.
RLS - SC.
I divided the knitting process into several stages.
The first stage - Knitting gum cuff
In order to start knitting, we recruit a chain of 7 VP.

1st row - we knit 6 sc, starting from the 2nd from the loop hook.
2nd row - we knit RLS in each half-loop of the previous row - i.e. each time, knitting a column, we hook the distant thread of the loop.
3rd - 15 rows we knit similarly to the second. This should result in a rubber band cuff:

Now we fold the elastic in half and connect the extreme rows with half crochets. As a result, we get the ring:

Second Stage - Product Basis
We begin this stage with a cuff strap. To do this, in a circle between each pair of rows we knit 3 sc - this will be the first row of the base. In total, in this series should be 22 RLS.

We turn out the elastic so that the seam is hidden from the wrong side.
2nd row - we knit RLS in each half-loop of the previous row (for the back thread of the loop). It turns out 22 sc.

3rd - 6th rows are knitted similarly to the second.

The third stage - Closing gloves
Now we are going to decrease: with each row we make decreases more often.
7th row - we knit the first two columns of the previous row as usual (as 2-6 rows of the base of the product), we knit the third and fourth together, and so on until the end of the row. By the end of the series should be 17 RLS. To make it easier to navigate at the beginning of a new row, make notes using a thread marker.
8th row - now every second or third column is knitted together.
9th row - we knit together a pair of columns of the previous row.
10th row - to the last row you should have 5 columns. We collect loops through them on one hook - only 5 loops - and knit with one column. We cut the thread:

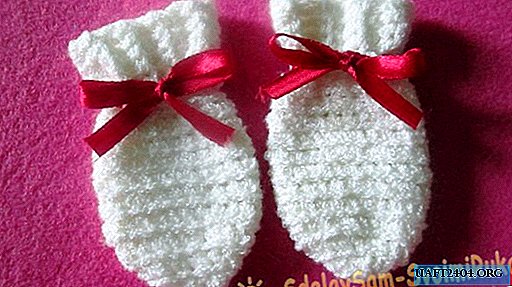
We set the thread to the wrong side, tie a knot so that the product does not bloom. Here is such an anti-scratch mitten:

And after a while the same second will be ready:

Now we make out products to your taste. You can thread a thin satin ribbon between the cuff and the base of the mitten and tie it on a bow:
Mittens on a baby complete with socks from the same yarn will look very worthy.

Share
Pin
Tweet
Send
Share
Send