Share
Pin
Tweet
Send
Share
Send
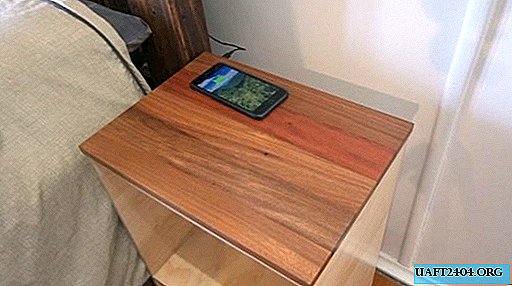
This project is very simple, and it can be done by anyone with basic skills in the field of woodworking. As for consumables, for the most part - it is plywood and cheap electronics.
Making a bedside table frame


To begin with, you need to build a frame, the main part of the future design. For these purposes, you can use, as in this case, plywood or MDF!
It will take one sheet of size 1200 mm x 600 mm. It needs to be cut into 2 side panels and 3 internal shelves. It is recommended that the shelves be cut immediately together to achieve 100% the same size.
To create the legs, you can use the milling machine to create 3 grooves in width similar to plywood. This added visual clarity, plus the necessary strength for the connection.
Before gluing the elements, all internal surfaces are carefully polished. It is much simpler and more convenient to do now, when they are easily accessible.
Boards stick together. It is recommended to drive several dowels into the shelves through the legs to provide additional structural strength.
Making countertops for bedside tables


It was originally planned to use the same sheet of plywood for these purposes, but such a design could not be too reliable. Therefore, solid wood was taken instead, but the pitch of the milling machine remains the same.
After you cut the upper part according to the required dimensions, the next task is to prepare the necessary place for the charger. I use the simplest and cheapest charger with a micro-USB cable. There are mounting screws at one end of the cable.
The most important thing is to pay attention, so to speak, to testing in order to find out what is the permissible distance between the gadget and the charger. In our case, this is 5 mm, which must be "removed" from the table in order to form a neat recess, where the charge will be inserted.
When the notch is done, attach the charger and cable to the countertop for clarity and draw the lines to be cut. Then proceed to removal, "accelerating" to the required depth.
At the final stage, you need to polish the resulting countertop and finish (varnish) to make it look attractive
Assembly of bedside tables


Once the top of the table is completely dry, lay the countertop upside down on the frame, aligning it the way you want to see it later. Fasten the top in place and drill holes. Do this carefully so as not to drill through the countertop.
Since in our version hardwood was used to create the countertop, the holes widened slightly, given the potential seasonal changes (expansion).
Then you need to countersink holes (using a multi-blade cutting tool to get cylindrical recesses), screw 2 together.
Finally, a usb connector is inserted into the countertop for further use.
Testing and Verification


If all the previous steps have been completed correctly, you only have to enjoy the fruits of your labor and connect the gadget for charging.
Original article in English
Share
Pin
Tweet
Send
Share
Send

