Share
Pin
Tweet
Send
Share
Send
The problem is solved simply by replacing the unit responsible for regulating and shutting off the water flow. This device in cranes of an old design is called a box, in modern - cartridges. They vary in size and for the acquisition of a new one it is desirable to dismantle the old one and use it as a model. You can buy the necessary parts in almost any hardware store.
Necessary tools, materials and spare parts
To perform repair of the mixer by replacing the cartridge (axle boxes), we need:
- pliers;
- a piece of cloth (rags);
- Phillips screwdriver with tip PH1 or PH2;
- gas wrench (adjustable) or any other suitable in shape and size.
Of the spare parts, the actual cartridge (box) of the required size, which we purchase in the store, will be required. It is also recommended to buy a new screw for attaching the handwheel handle; the old one may not fit in diameter or length or it may be damaged during dismantling.
Replacing the cartridge (boxes) in the mixer
Before starting any work on the water supply system in an apartment or house, it is necessary to turn off the water supply. To do this, tighten the valves for cold and hot water in the input node, and regardless of what you do, both valves overlap. Replacement of the axle box (cartridge) in the mixer is carried out in the following order:
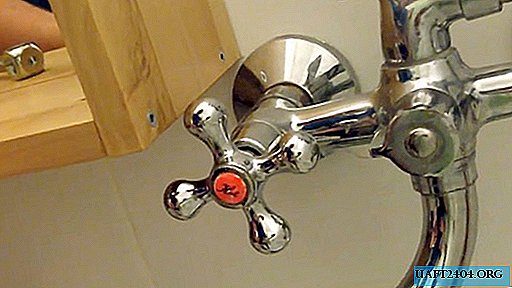
1. Unscrew the decorative plug by rotating it counterclockwise with your fingers. If their efforts are insufficient, pre-rotate the plug with pliers. On some models, the plug is mounted without thread and in order to remove it, you just need to pry it with a knife or a screwdriver.

2. Unscrew the fixing screw and remove the handle-handwheel. To do this, use a Phillips screwdriver.


3. Turn off the decorative element: in most cases this can be done by hand. If it doesn’t work, we use pliers. In order not to spoil the surface, a piece of cloth can be put under the sponges.

4. Unscrew the axle box from the mixer. We use a special gas wrench (adjustable), in the absence of one, you can use a conventional open-end wrench or head.


5. We clean the mixer channel, using a piece of cloth wrapped around the tip of a screwdriver. We remove solid particles from the case: grains of sand, rust, they are actually the main reason for the failure of the shut-off and control unit.


We use the defective cartridge as a sample when buying a new one in the store, in the absence of exactly the same, you can purchase an analogue. It is important that they match the landing size. The screw that fixes the handle-handwheel on the rod may not fit and it makes sense to attend to the acquisition of a new one.

Now you can start assembling the mixer, which is performed in the reverse order.
6. Install a new cartridge in the channel and screw it clockwise. First, we do this with our hand to the stop, then we reach it with a wrench. You should not make much effort - this can lead to thread breakage and require a complete replacement of the mixer.

7. Screw the decorative element with your fingers.
8. Fasten the handle-handwheel into place by tightening the screw with a Phillips screwdriver. If the screw you purchased turns out to be too long, you can put on a suitable nut with diameter along with the washer.

9. Hand-tighten the decorative plug.

10. Open the water supply and check the mixer cartridge for leaks. It comes to light by simple inspection, for fidelity I use a dry rag or napkin.
Open and close the water several times to make sure that the mixer works properly. When the feed control knob is turned, the force must be uniform and seizures are unacceptable or any other defects are unacceptable.
Conclusion
Together, we replaced the cartridge (box) and eliminated the problem of water leakage in the kitchen. An experienced master takes no more than five minutes to complete such work, more time is spent searching and purchasing spare parts.
When repairing plumbing fixtures, there is no particular danger unless fingers should be pushed into the channels for inspection or cleaning. You can injure your skin or get stuck in a narrow. When working, one should also not exert excessive efforts, usually this results in thread breakage or damage ("licking") of the faces on the bolts and nuts.
Before tightening the fixing screw on the handwheel handle, a bit of grease, such as Litol, is recommended. This will eliminate the possibility of sticking it to the rod and make it easier to twist for the next repair.
Share
Pin
Tweet
Send
Share
Send